

Modular Test System Part 1
This is the first post about a modular test equipment / data acquisition system I'm working on. I had the opportunity to work with PXI based equipment on several projects back when I was in school. I really liked these systems because they made it easy to plug in a card for any type of I/O and get data in or out of PC software easily. It is possible to do things like capture samples with an oscilloscope card, process them in software, then drive a signal generator output based on the result. Something that would be much more difficult with individual pieces of equipment. The problem with PXI gear is the cost. It is generally far too expensive for home use.
So I decided to build my own. Not something as capable as PXI, but a simpler and lower cost version which will be enough for my uses. The overall architecture includes a main controller, up to 8 I/O cards, and backplane to connect them all. The main controller handles data processing and interfacing with a PC, while interfacing to each I/O card through an SPI interface. The backplane distributes power, SPI, and a few other signals between cards. I/O cards interface between SPI on the backplane and, well, pretty much anything. I have built a few low speed analog and digital output cards to start. Once the basic platform is working I have a list of other ones to design.
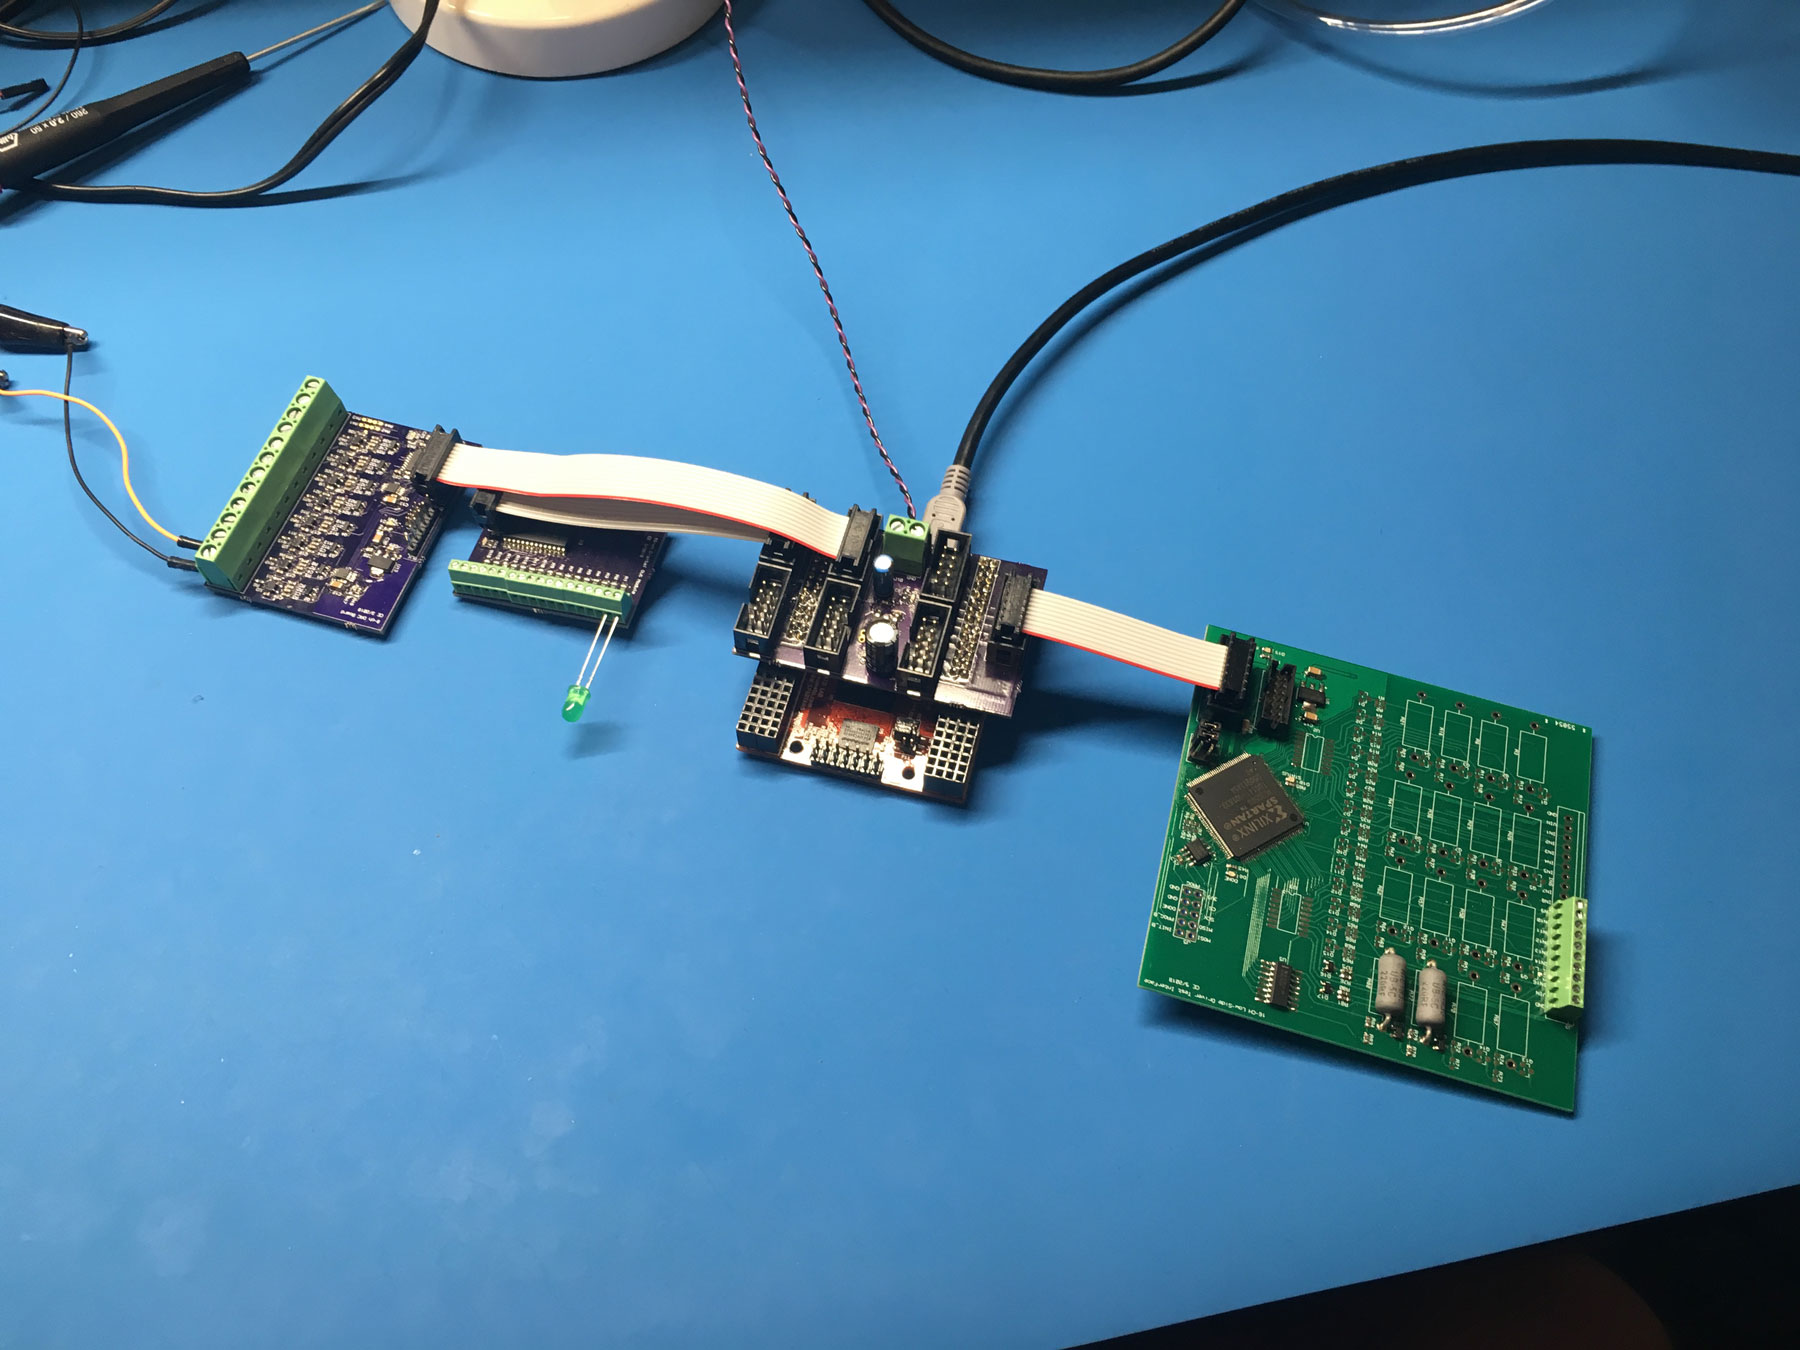
The first iteration of this project last year was just a breakout board on top of a Numato Saturn FPGA dev board with 10-pin ribbon cables to connect each card. Made for a cheap way to test things out without building a full controller and backplane. From left to right in the photo below:
- Analog output card - 8 channels of 0-30V outputs at up to 10kHz
- Digital I/O card - 16 channels of 5V digital I/O
- Controller - Saturn FPGA board on bottom, breakout PCB on top
- PWM input card - 16 inputs designed to interface with low-side drivers. Switchable 5W load resistor on each channel. Inputs go to an FPGA to allow frequency and duty cycle measurements.
After that, I started planning the card design. Two decisions were made to keep cost down: The card size is 3.9" square, which just fits inside the 10cm max size where cheap boards can be ordered from many PCB fabs. Also, standard PCIe connectors are used. The connector housings are super cheap due to being made in large quantities for PCs and the mating half is free (PCB contacts). While they are still able to support high speed signals with proper layout. The only downside of this design is the card dimensions don't fit any existing standard, which makes finding a chassis harder. I ended up using a Vector CCK12S-H/90, which is a small rack kit with adjustable rails to handle various card sizes. This ends up not being a great solution, but I will get into that with the next blog post.
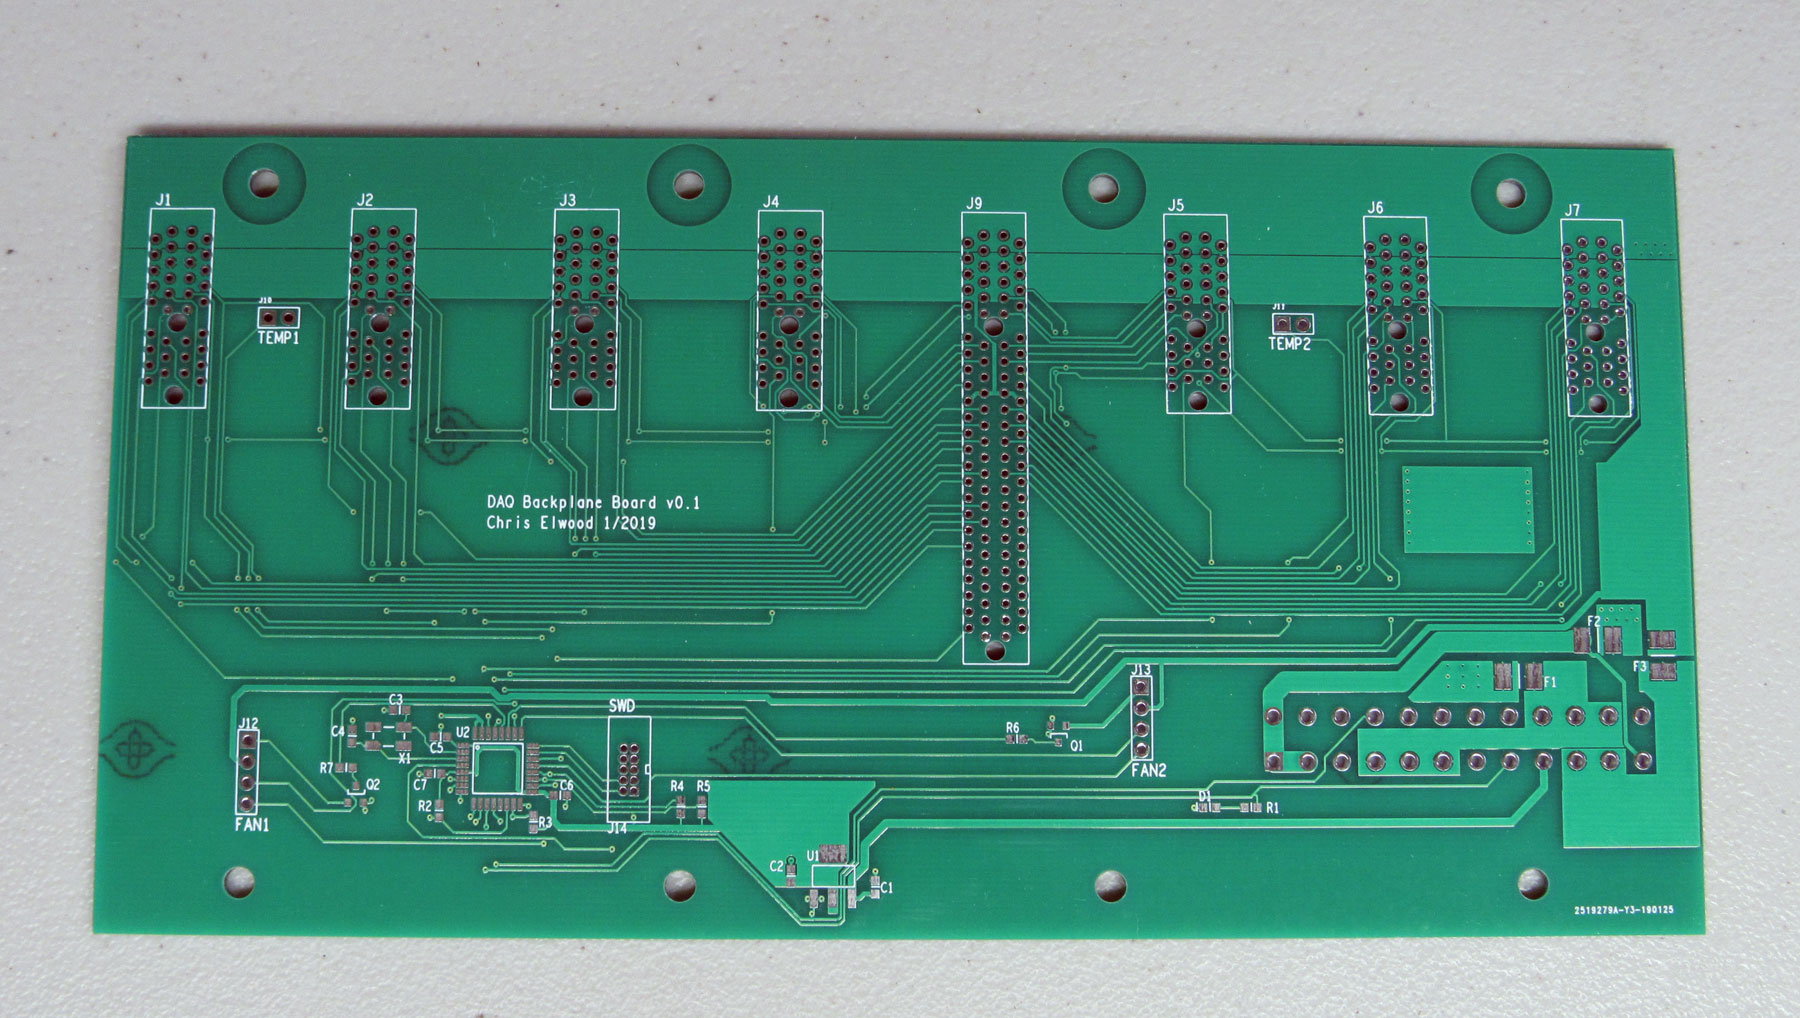
With the form factor decided, I started on a backplane PCB. This first one supports a controller and 7 cards (controller can handle 8, but the chassis is only wide enough to fit 7). It provides an independent SPI bus from the controller to each card, a common I2C bus (for identifying cards), and power (supplied from an ATX power supply connected on the back). There is also a STM32 microcontroller to monitor temperatures and drive fans if needed.
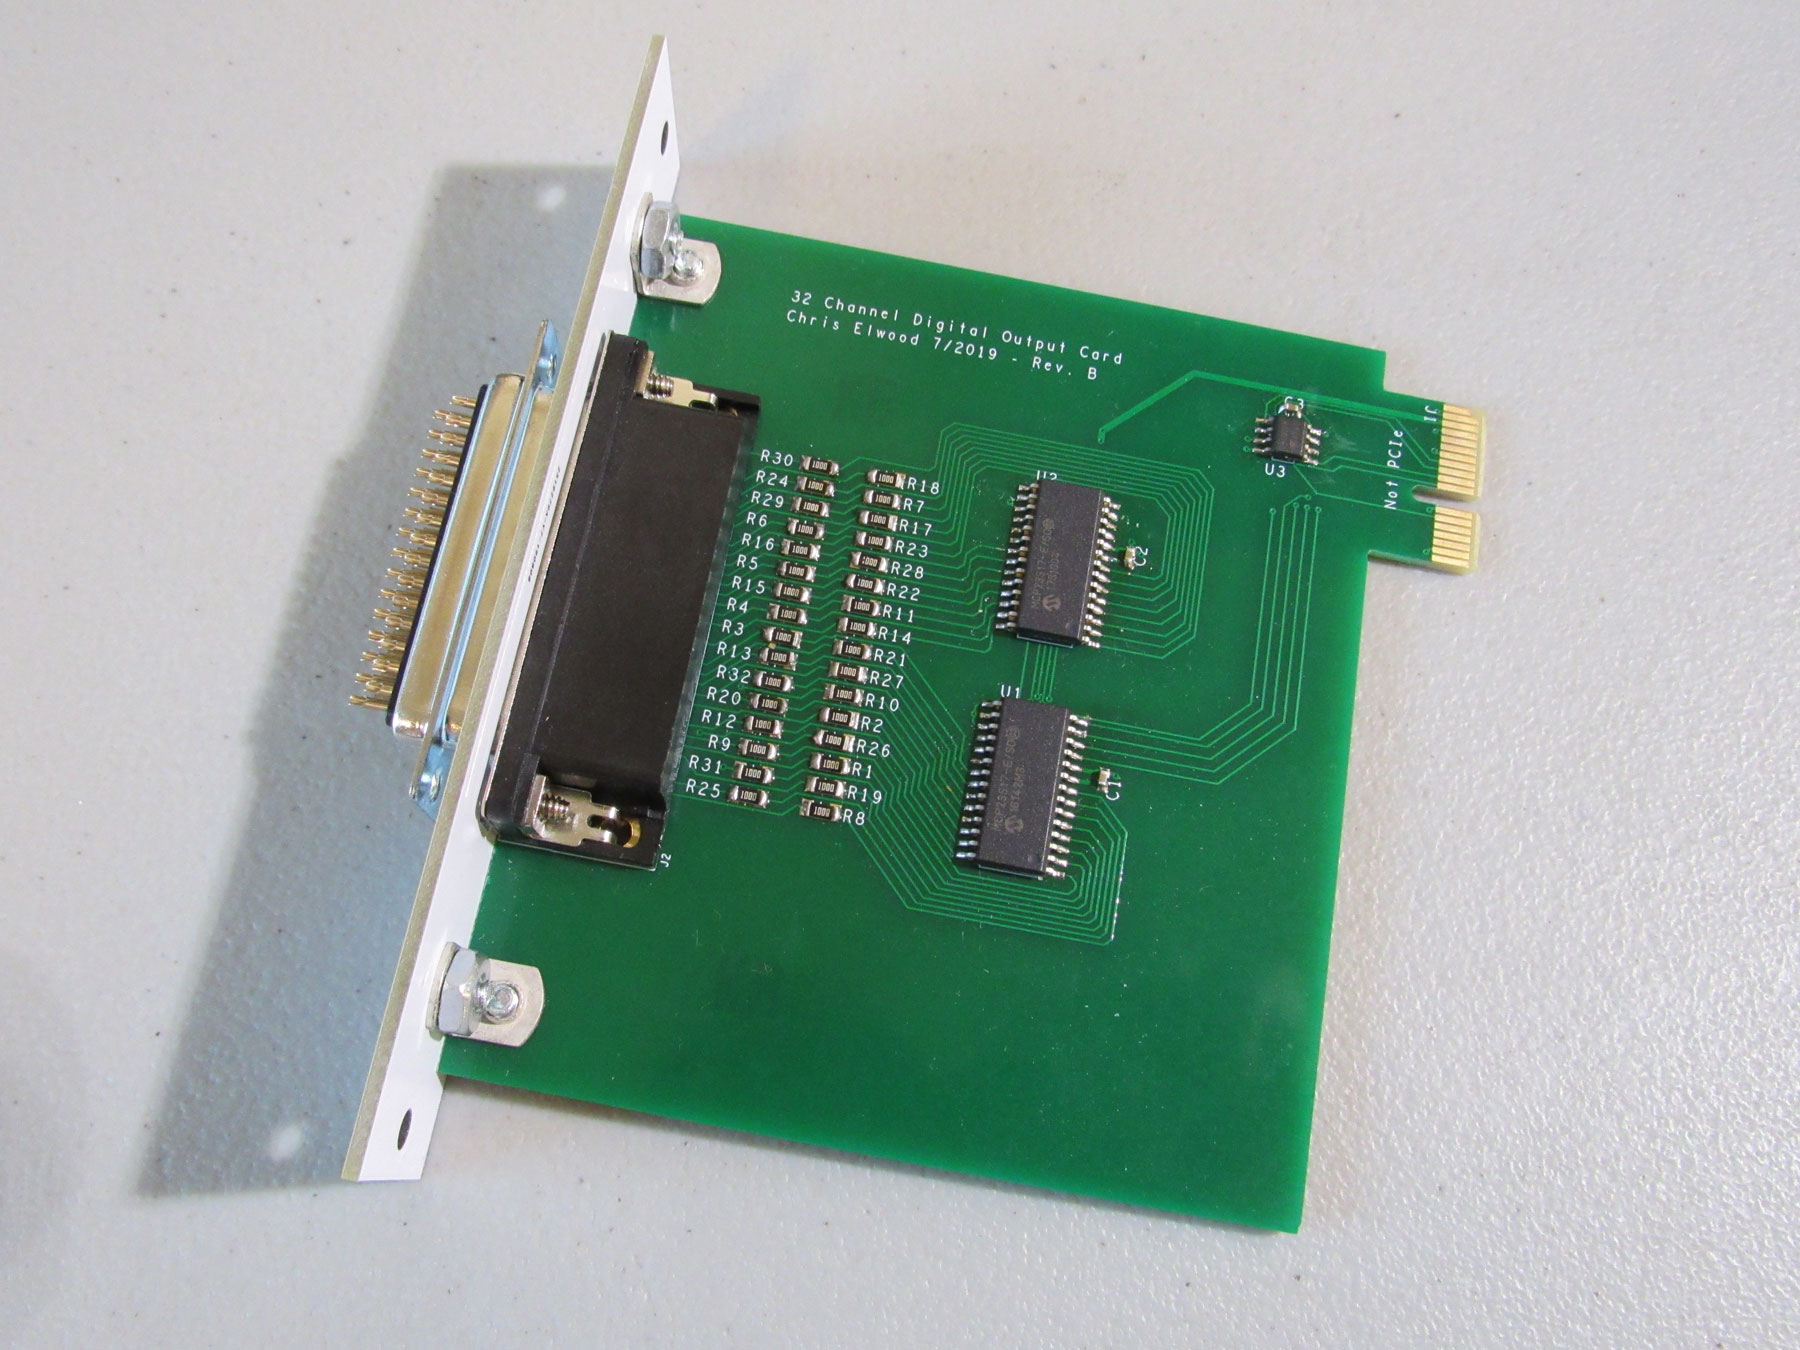
The next step was creating the first I/O card. I started with a digital I/O card because it was the simplest and I needed to work out the mechanical design. The front panel is a white PCB, attached with two angle brackets. On the first version, I put the angle brackets too close to the edges of the main PCB and they hit the card guides in the chassis, preventing the card from being inserted. The second version, shown below, fixed this and made some other minor improvements. Electronics wise, it is simply a pair of MCP23S17 GPIO expanders.
With that done, it was time to build a proper controller. I decided to go with a FPGA + microcontroller architecture. The FPGA handles the 8 SPI interfaces to the I/O cards and can offload any timing critical operations from the micro. The micro runs application code and provides USB and ethernet interfaces to a PC. I am using a Xilinx Spartan 7 FPGA and STM32H7 micro. The FPGA is connected to the external memory interface of the STM32 as if it were an SRAM. This allows registers to be created in the FPGA design and mapped into the STM32 memory space as if they were peripherals on the micro itself. There is a 100Mbit ethernet PHY for networking and a FT232H chip for high speed USB. An SD card slot is also included as another option for storing data.
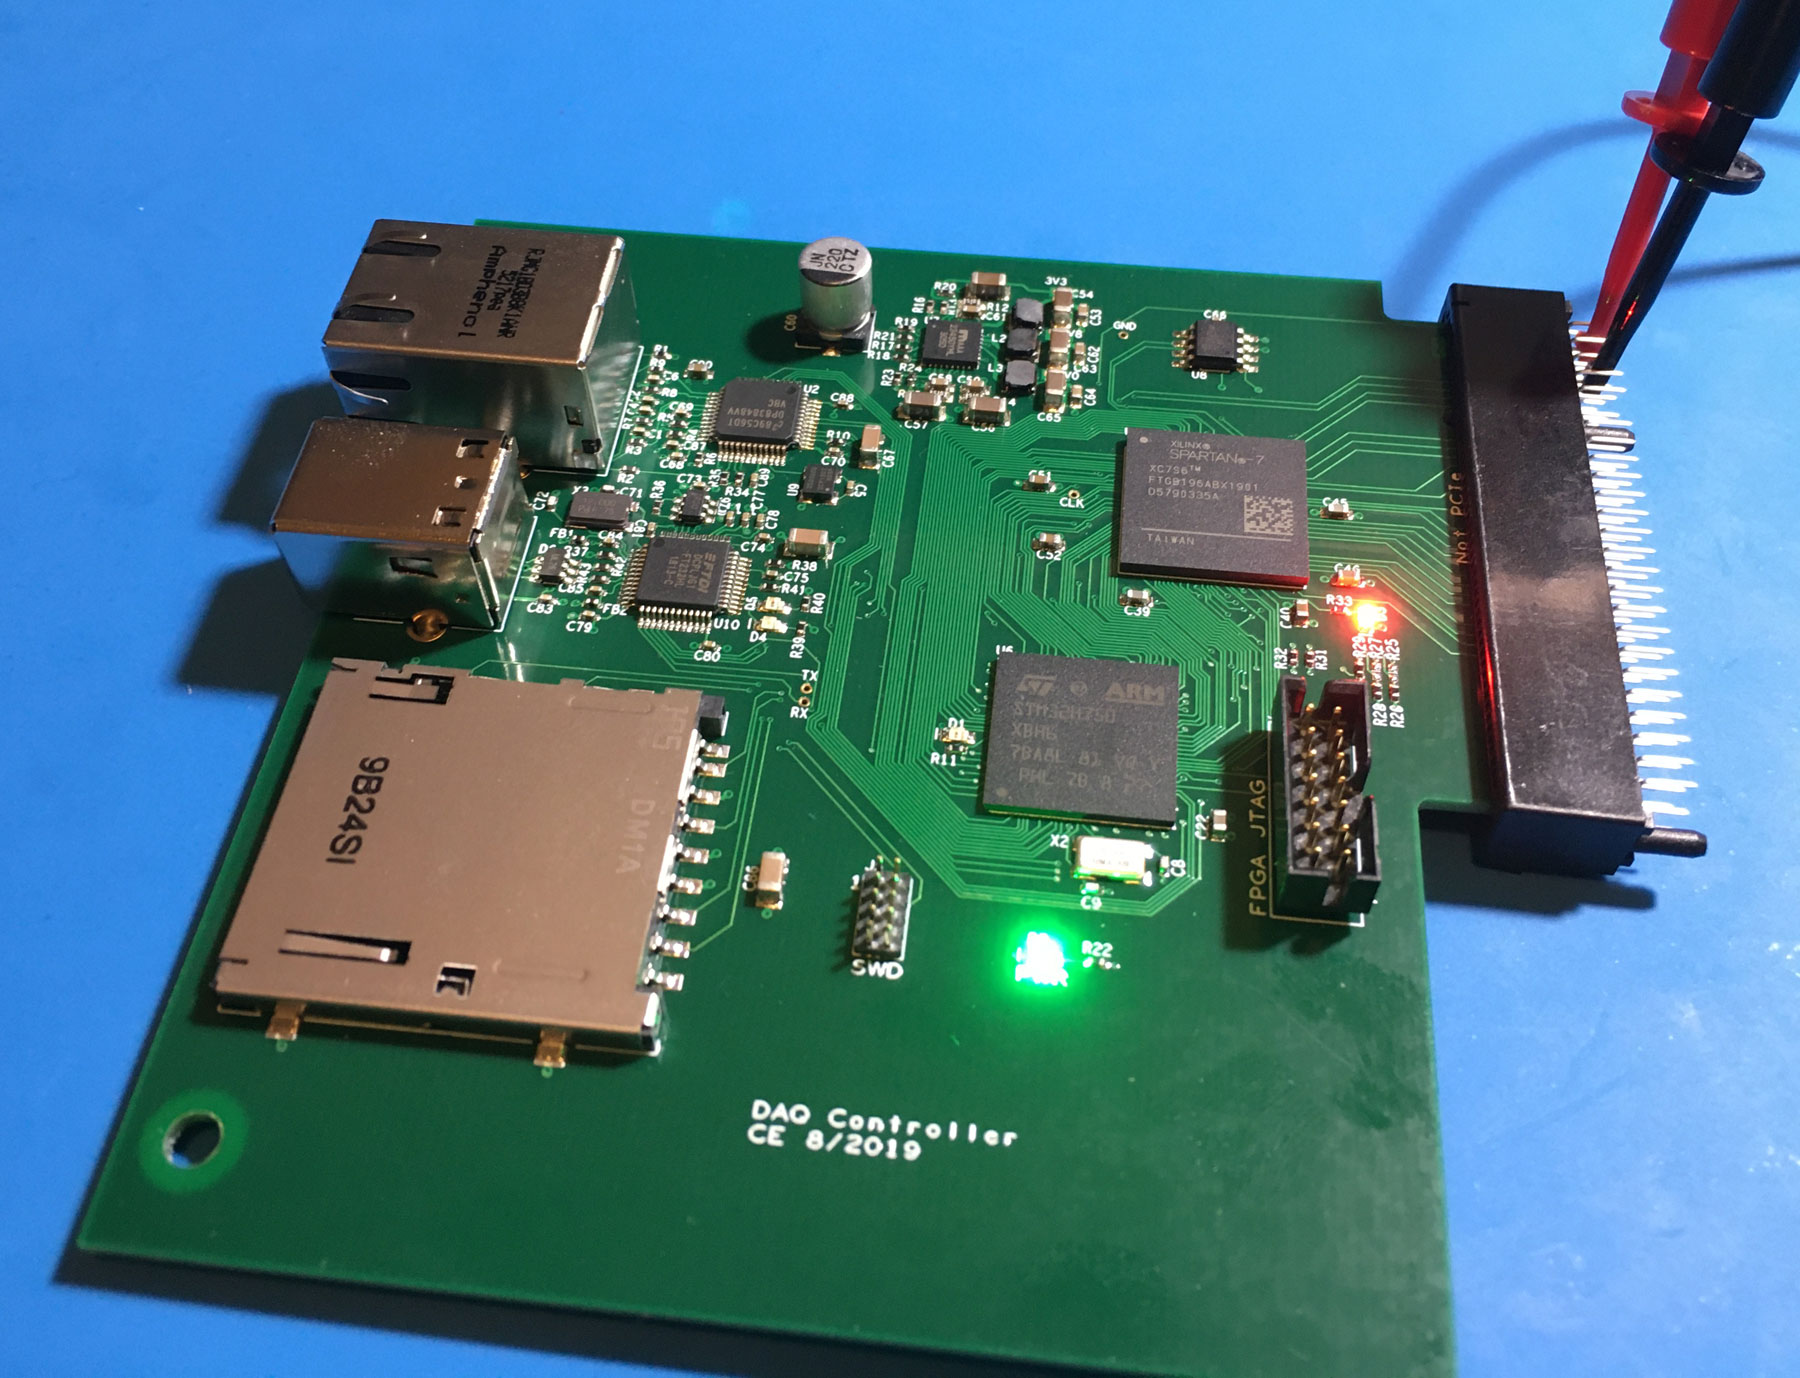
This board was my first attempt at using large BGA packages. The FPGA is a 196 ball, 1.0mm pitch package. The STM32 is 265 balls, 0.8mm pitch. I was a little worried about soldering them, but it actually didn't turn out to be a problem at all. I followed the manufacturer recommended PCB pads for each and included a full silkscreen outline for aligning the chips during placement. This worked well. For the ethernet PHY and USB chip I chose QFP instead of QFN packages because I was worried about soldering the QFNs. Having more experience now, I wish I had done it the other way. I've had more issues with solder bridges on QFP chips due to the long and closely spaced pins, while QFN chips have been easier than expected to work with. I may actually replace the ethernet PHY entirely on the next revision. This board uses a DP83848, which has a bunch of annoying quirks. I have since found some alternatives which are both better and cheaper
I learned a couple lessons on layout with this board too. I usually place parts, route signal nets, then do power planes last. In this case I placed the FPGA and STM32 where you see them in the photo above and routed all the signals to each. I was going to put the power supply near the botttom of the board (in what is now empty space). I ran into an issue when I looked at the FPGA though. It has three power rails: 3.3V IO, 1.8V AUX, and 1.0V core. The CPGA196 package it's in is designed for 4-layer boards and has its power connections arranged to be easily routed on one plane layer:
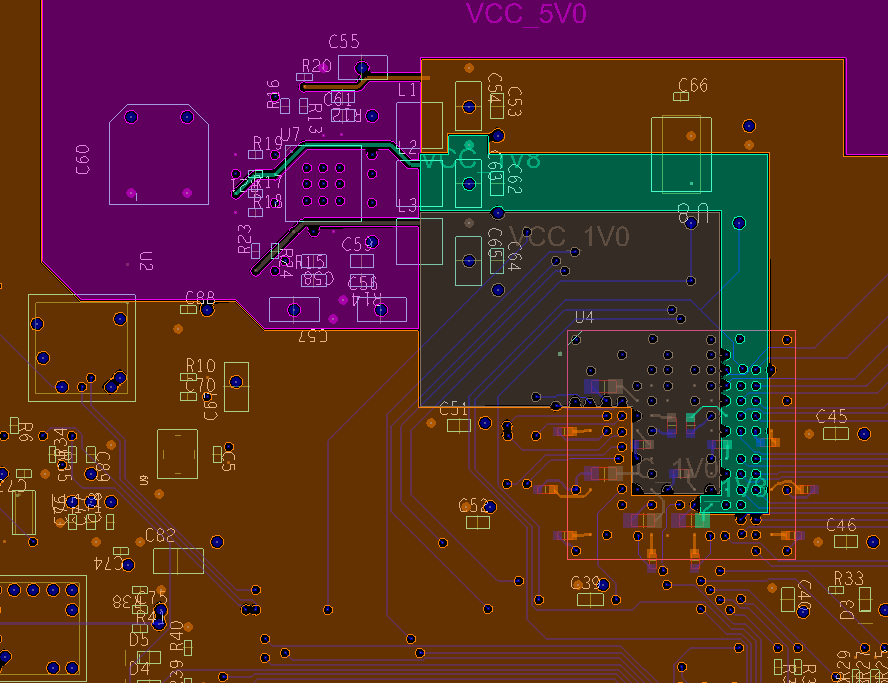
The FPGA is U4, outlined in red on the right. The 3.3V IO voltage (orange) connects to balls around the outside. The 1.0V core voltage (gray) connects in the center. The 1.8V aux voltage (green) is to the right of the core voltage connections. There is an area with no IO power connections at the top, which gives space to get the aux and core power planes out on the same layer. Problem is, it forces you to break them out in that direction. And I couldn't easily rotate the FPGA due to the already routed signal connections. If I wanted to keep the power supply at the bottom of the PCB, those planes would have to come out the top, turn around 180 degrees, then pass under the STM32 to get to the power supply. This would break up the main 3.3V plane (4 layer board, so I only have a single layer for power) and cause other problems. So I ended up having to move things around and cram the power supply in at the top. Something that could have been avoided if I looked at the power layout earlier in the process.
So far I have some minimal software written. The FPGA has a state machine to initialize the digital I/O card over SPI and update its outputs based on commands from the STM32. The STM32 has enough code to bring up the hardware and pass through commands sent from a PC over USB. I have a python script on the PC which currently just blinks an LED on the I/O card.
There is much more I want to do in this area. Each I/O card will need a driver with three parts: FPGA module, embedded driver code, and PC code. I need to define standard formats for each of these so drivers can be loaded in based on the cards present in the chassis. Ideally, the software will identify each card based on its I2C EEPROM and configure itself appropriately. A lot of work is needed to get to that point though.
One downside of this architecture is that the signals for each card slot connect directly to FPGA pins. So changes in card configuration will require recompiling the FPGA bitstream. Meaning the user will need the whole Xilinx toolchain installed. Not ideal, but I don't see a way to avoid it without majorly reducing flexibility or making the cards more complicated. I have used commercial systems which behave the same way (require FPGA rebuild when cards are changed), so it is not completely without precedent.

There are some design choices I am questioning now that the whole system is together. It was originally intended for a specific project and had some compromises which made sense for that project. But I'm now leaning towards it being a more general purpose platform. I'll get into this more in the next blog post, where I cover the second revision hardware I am currently working on.
Design files and draft mechanical and electrical specification documents are on my github. Be aware these are very much a work in progress and will likely change.